
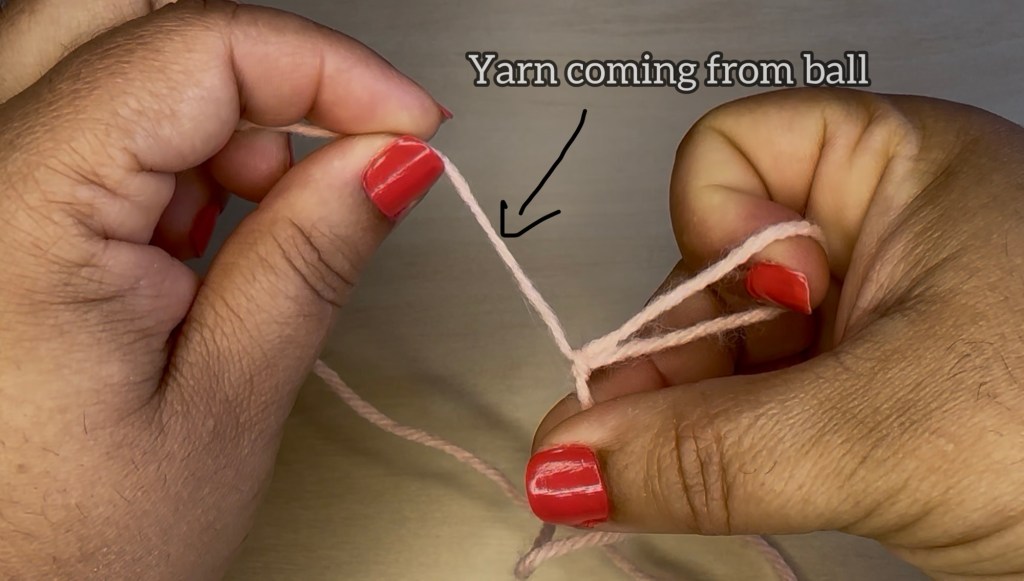
The slip knot is the very first step in most crochet projects. It creates the starting loop that goes onto your crochet hook before making foundation chains or stitches.
In this beginner-friendly tutorial, you’ll learn how to make a slip knot step by step in a simple and easy way.
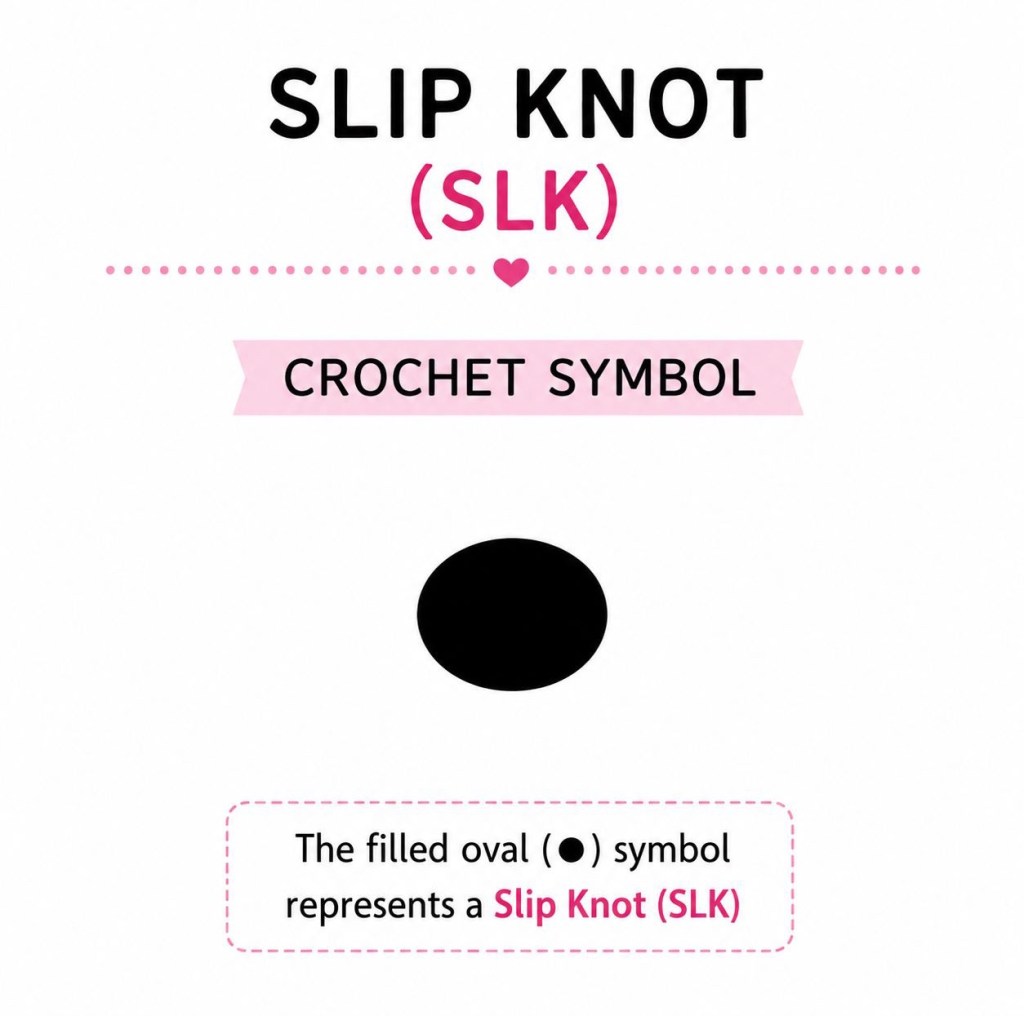
Abbreviation
SLK = Slip Knot
What It’s Used For
A slip knot is used to begin most crochet projects and serves as the starting point for chain stitches and rows of crochet.
Crochet Chart Symbol

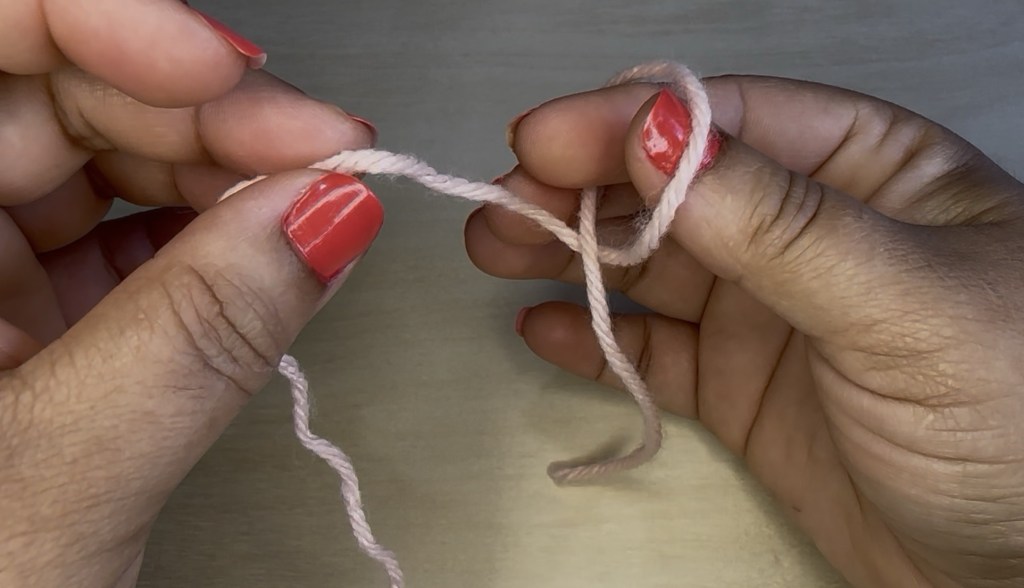
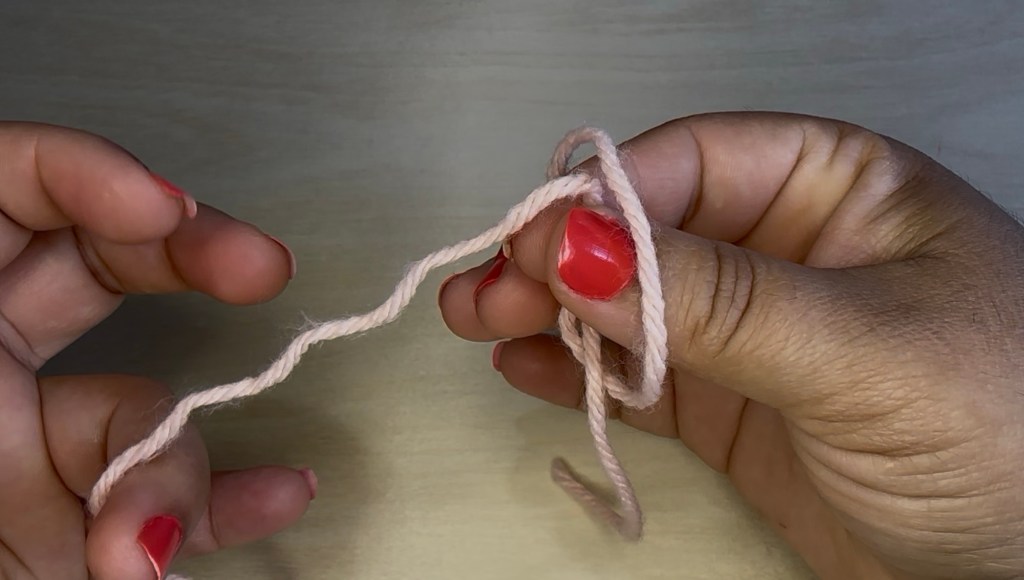
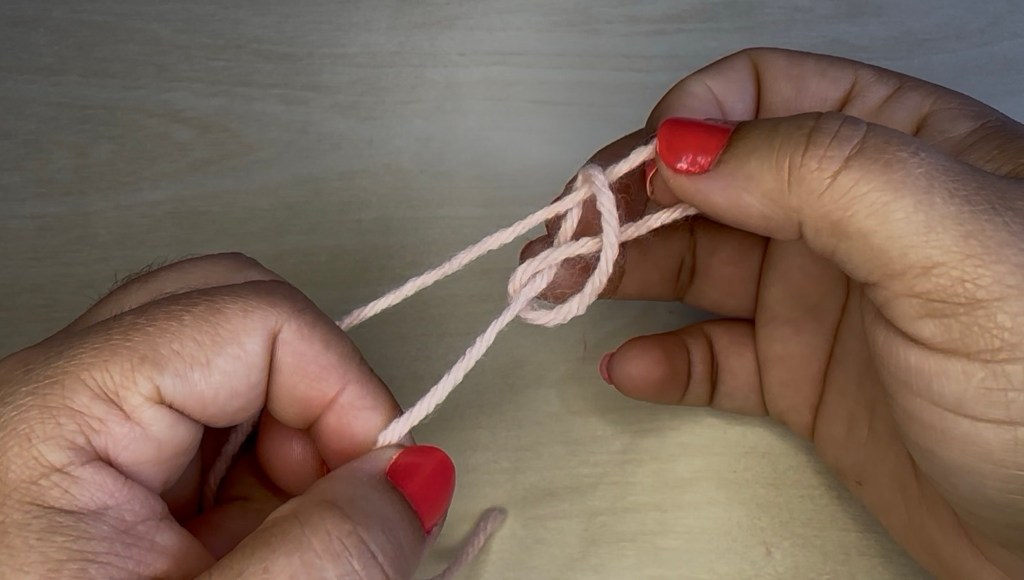
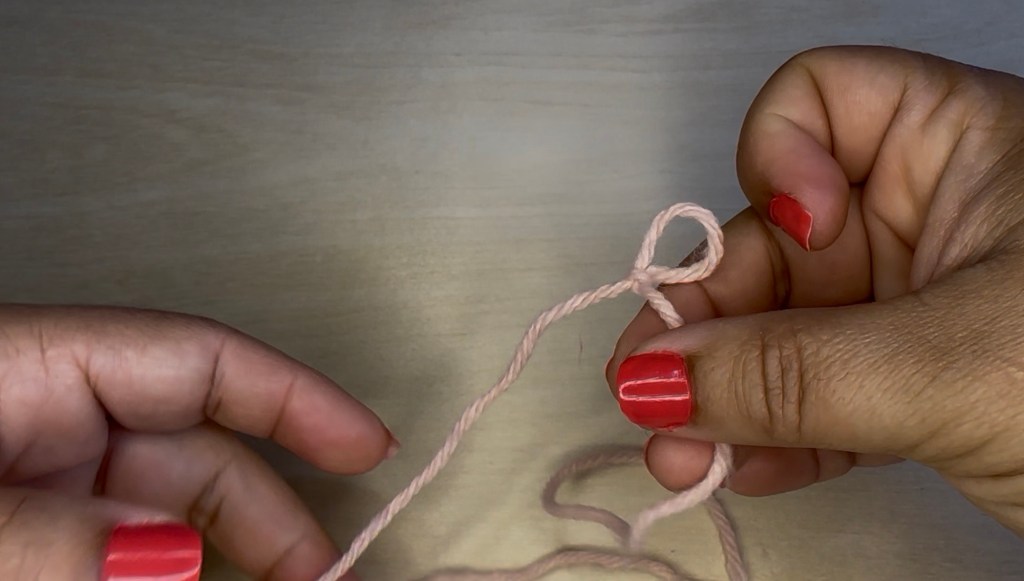
Beginner tip: Don’t tighten the slip knot too much around the crochet hook. The loop should move easily on the hook without being too loose.
Find the Crochet Chain Stitch here How to crochet the chain stitch (Step by step)

Leave a comment